How to Cancel Your Keep2Share Premium Subscription: Step-by-Step Guide + Alternatives
Keep2Share is a well-known cloud storage and file-sharing platform that offers both free and premium plans. Premium subscribers enjoy faster downloads, larger storage limits, and ad-free access.
But sometimes, you may no longer need the premium features—maybe you’re switching to another service, cutting down on expenses, or simply not using your account enough. Canceling your Keep2Share subscription is easy, but you need to follow the correct steps to ensure that automatic renewals and payments are stopped properly.
This guide will walk you through:
-
How to cancel your Keep2Share subscription directly on the platform
-
How to stop recurring payments via your payment provider
-
What happens after cancellation
-
Tips for managing your subscription
Step-by-Step Guide to Cancel Keep2Share Subscription
Here’s the most reliable way to cancel from inside your account:
-
Log in to your Keep2Share Account
-
Visit the official Keep2Share website.
-
Enter your username/email and password.
-
-
Go to Account Settings
-
Click on your profile or menu section.
-
Find “Account Settings” or “Profile”.
-
-
Access Subscription or Billing Information
-
Navigate to the “Subscription” or “Billing” tab.
-
Review your active plan details (duration, renewal date, payment method).
-
-
Select Cancel Subscription
-
Click the “Cancel Subscription” button or link.
-
Some users may see it under “Manage Subscription.”
-
-
Confirm the Cancellation
-
Follow the on-screen prompts.
-
A confirmation page will display when successful.
-
-
Check Your Email
-
Look out for a cancellation confirmation email.
-
Save it as proof in case of billing disputes later.
-
Alternative Method: Cancel via Payment Provider
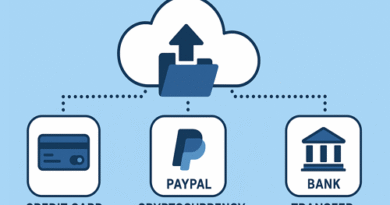
If you can’t find the cancellation option in your Keep2Share account, you can stop payments directly through your payment provider.
Here’s a quick overview:
| Payment Method | How to Cancel Automatic Payments |
|---|---|
| Credit/Debit Card | Contact your bank or card provider and request to stop recurring charges. |
| PayPal | Log in → Go to Settings > Payments > Manage Automatic Payments → Select Keep2Share → Cancel. |
| Cryptocurrency | Typically non-refundable; future payments won’t process unless you manually send funds. |
| Local Payment Services | Contact the service directly to block recurring charges. |
What Happens After Canceling?
-
✅ Your Keep2share premium plan remains active until the end of the billing cycle (you won’t lose immediate access).
-
❌ You won’t be charged for the next renewal.
-
🔄 Your account automatically switches back to the free plan.
-
📂 All your files remain safe, but free accounts have slower download speeds and stricter limits.
Tips Before Canceling
-
Check Renewal Date: Cancel at least 24–48 hours before your renewal to avoid unexpected charges.
-
Save Files: Download important files in case you plan to delete your account entirely.
-
Look for Discounts: Sometimes Keep2Share offers discounts to users attempting to cancel—check if there’s a special deal.
-
Keep Confirmation Email: Always save the email proof of cancellation.
Contacting Support
If you encounter issues during cancellation or don’t see the option in your account:
-
Reach out to Keep2Share Support via the help/contact section on their official site.
-
Provide your account email and last payment details for faster assistance.
Final Thoughts
Canceling your Keep2Share subscription doesn’t have to be stressful. By following the steps above—either directly through your account or via your payment provider—you can make sure your subscription ends smoothly without surprise charges.
If you only need occasional use, consider sticking with the free plan instead of deleting your account entirely. This way, your files remain safe, and you can always upgrade again later if needed.


